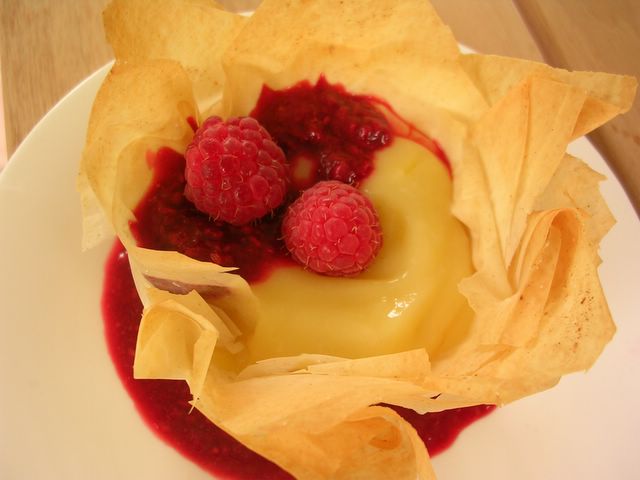
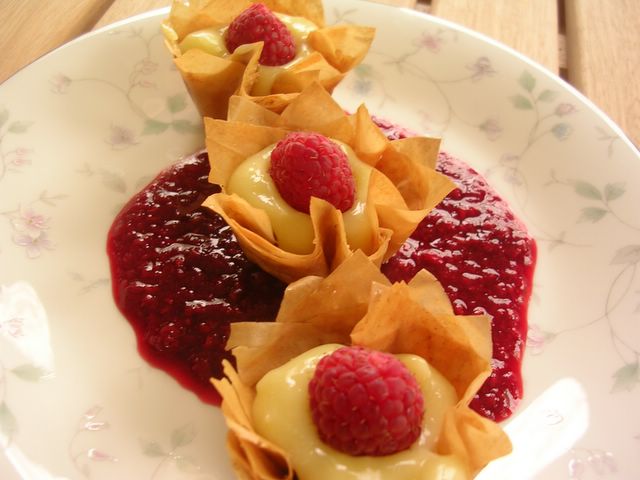
This recipe is from Simple Tarts by Elizabeth Wolf-Cohen. She used lime curd, but I substituted lemons since I had many. It is the first time I tried this recipe, and I have to say that I am very impressed. The contrasting flavors, textures and colors make this an outstanding dessert. I used the leftover scraps of dough to make mini tartlets, and I liked those bite-sized desserts even more. (They were much easier to eat!) It may be a good idea to prepare the components of the dessert in advance and to assemble the tartlets shortly before serving so that the phyllo cups do not become soggy and lose their wonderful crunch. Also make sure that you use a light hand when you handle the phyllo cups as they are fragile.
Phyllo Cups:
4 sheets defrosted phyllo dough 2 tbs unsalted butter, melted A little sugar to dust the phyllo squares
Lemon Curd: 2 eggs, beaten 1/2 c (1 stick) unsalted butter, diced 1/2 c sugar 2 tbs freshly grated lemon zest 1/4 c freshly squeezed lemon juice 1/2 tsp vanilla (optional; use only if you are super sensitive to eggy smell in your dessert like Yurdaer) Raspberry Sauce: 6 oz frozen sweetened raspberries Fresh raspberries
Preheat oven to 350F. Lightly oil 4 3/4 c-ramekins with vegetable oil. Cut the phyllo dough sheets into 6-inch squares. Keep the unused dough covered with a dishtowel to prevent it from drying out.
Place a phyllo square on the work surface, brush with a little melted butter and sprinkle with a little sugar. Butter a second square, and lay it over the first at an angle; sprinkle with a little sugar. Repeat with two more squares. Press the stack of squares into the custard cups or ramekins, pressing into the edge and keeping the edges turned up. Set the cups on a baking sheet for easier handling. Bake until crisp and golden, about 10 minutes. Transfer to a rack to cool.
In medium saucepan, combine the eggs, 1/2 c sugar, butter, lemon juice, zest and vanilla (if you are using it). Cook over medium-low heat until the mixture begins to thicken and bubbles begin to appear on the surface, about 3 minutes. Scrape into a bowl and cover with plastic wrap, pressing the wrap against the surface if you do not want a skin to form. Refrigerate at least 1 hour.
Process the frozen raspberries until smooth. Add more sugar if needed. Strain if you want to get rid of the seeds. Mix with the fresh raspberries. Divide the curd mixture evenly among the phyllo cups. Top each with some of the raspberry sauce.
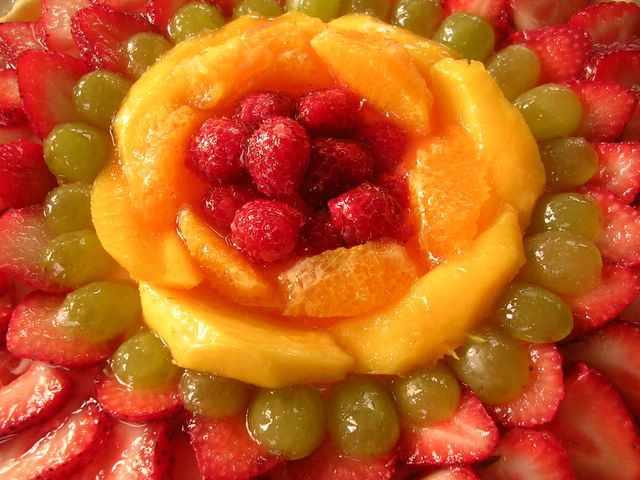
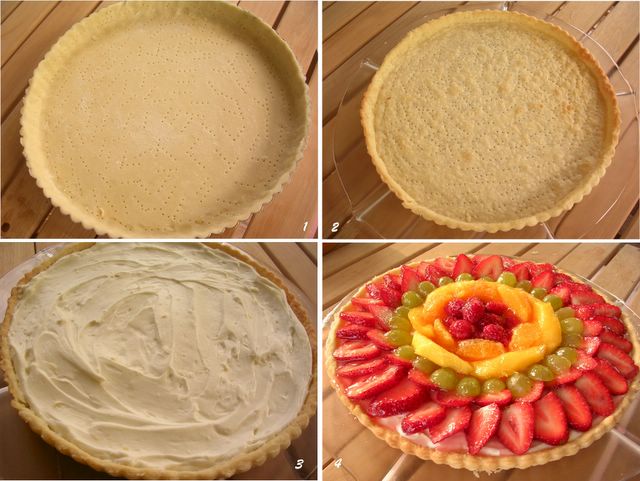
I had seriously decided to limit my baking to once a week; but all it took to dissolve my resolve was a trip to the supermarket. When I saw the stands brimming with late spring's bounty, I knew that I just had to make a fruit tart. Fruit tarts are beautiful any way you make them; you can go for a rustic look by mounding different kinds of fruit, or arrange them in triangles for a "summer fruit pizza". They also look very elegant with only one kind of fruit. This recipe uses cream cheese for both the crust and the filling; and although I loved the light and luscious filling, I thought that a drier and crunchier crust might have worked better than this moist and flaky one. I also have to warn you that the sides shrank quite a bit during baking. When I make a fruit tart again, I will probably use my regular crust recipe.
Crust:
4 oz (1/2 a package) cream cheese, room temperature 1/2 c (1 stick) butter, room temperature 1 1/4 c flour 1/4 tsp salt 2 tsp sugar
Mix cheese and butter together. Add flour, salt and sugar, mix well until dough comes together. Shape into a disc, wrap and chill for half an hour or so. Meanwhile, preheat the oven to 400F. Roll into a 14-inch circle and use it to line a 12-inch pie pan. Prick the bottom and sides with a fork and bake until light golden brown for about 10-15 minutes.
Filling:
8 oz (1 package) cream cheese, room temperature 1/4 c sugar 1 tbs lemon juice 1 tsp lemon zest 2/3 c heavy cream 1 tbs apricot or other fruit preserves (optional) Fruit to decorate 1/4-1/2 c prepared gelatin mixture or fruit preserves to glaze
Beat the cream cheese with sugar, lemon juice and zest. Slowly pour in the whipping cream as you continue beating. Stop when all the cream is used and the mixture has thick whipped cream consistency. Fold in the zest. I mostly use this method because it is the fastest, but I have to warn you that the cream cheese-cream mixture may curdle if you overbeat. To be on the safe side, you may want to whip the cream separately and fold it to the cream cheese mixture at the end.
For assembly, warm the tablespoon of preserves and brush on the tart shell. (This is an optional step to keep the pastry from becoming soggy fast.) Starting at the outside edge, arrange the fruit in overlapping concentric circles. While choosing fruit, avoid kiwi and pineapple or use them briefly cooked, since the enzyme papain they contain inhibits gelling action and turns dairy fillings bitter on prolonged contact. An hour or two before serving, prepare some gelatin mixture with sweetened fruit juice and refrigerate until syrupy. Brush the fruit with this mixture and pour the leftover carefully so that it fills in the gaps of fruit and cream. This not only keeps the tart together when cut, but also sweetens the fruit and gives it a glistening glaze. (If you don't want to use gelatin, you can warm fruit preserves with some water or orange juice to dilute, strain if necessary and use this to brush on the fruit. It will not aid in cutting, but will serve the two latter purposes. Do this close to serving time as refrigeration dulls the glaze.) Refrigerate until served for gelatin to set. This fruit tart is best served the day it is made.
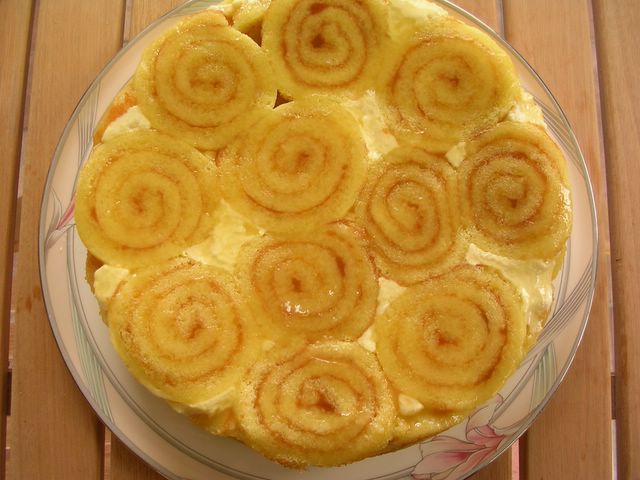
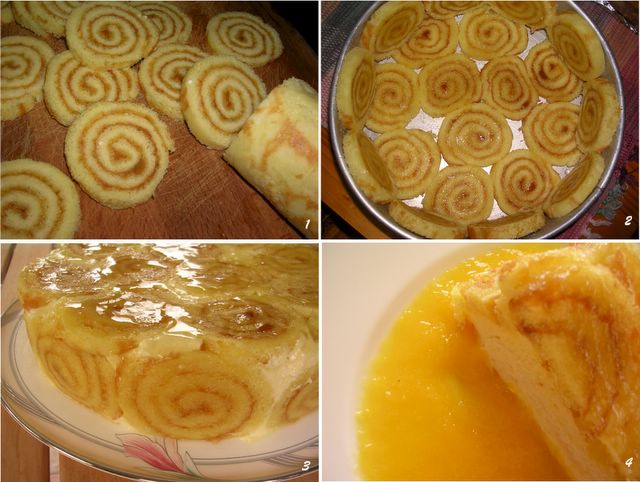
You might remember that my first charlotte experience went awry because the filling did not set well. That was a while ago, and I felt ready yesterday to experiment once again with unflavored vegeterian gelatin. This time, I loosely followed the mango charlotte recipe from The Art of the Cake by Bruce Healy. Instead of a dome, I opted for a regular 9-inch springform pan which proved tricky to line with round slices of cake, especially on the sides. Not surprisingly, just after I poured the almost-set filling in, I noticed that one of the slices lining the sides had fallen back into the pan and was already under a thick layer of mousse. (You will see exactly where this happened if you look at the picture carefully) Luckily I had a few extra slices, and I was able to replace the fallen one but I had no time to retrieve it from under the filling. The brand of gelatine I used is a very quick setting one, so I practically had to run around in my kitchen and had a good adrenaline rush until I completed the dessert. This time, I am more pleased with the results since the charlotte did not collapse. (I still think that I could have used more gelatine.) It looks good, and has this almost ethereal taste to it. If I make it again, I will make an extra sponge roll and cover the top of the mango mousse with slices of cake as well. Since this one is bottomless, it is a little difficult to serve.
Sponge roll prepared with 1/4 c (or more) orange preserves 2 1-lb fresh mangos 1/4 c + 2 tbs sugar 2 tbs lemon juice 4 tsp Kojel brand unflavored gelatin 2 c heavy cream 2 tsp sugar syrup (recipe below) flavored with 2 tsp orange juice Orange glaze (recipe below)
Prepare the roll several hours in advance and freeze it to make cutting easier. Brush a 9 or 10-inch springform pan with melted butter and dust with granulated sugar. Cut the roll into 3/8-inch slices. Line the sides of the pan with the slices. Arrange the remaining slices over the bottom of the mold. (As you might notice from the pictures, I carelessly did this in reverse order.)Refrigerate while you prepare the filling.
Peel and slice the mangos. You should have about 1 1/4 lb of flesh. If not, peel another mango. Puree the mango flesh with the sugar and lemon juice. (You should have a little more than 2 1/2 c of puree.) Sieve the puree to get rid of the bits of fiber. (Boy, was this was time-consuming!)
This is probably a good time to take the pan out of the refrigerator and brush the insides of the lining slices with sugar syrup.
For the filling, whip the cream until it holds soft peaks. Set aside. Mix the gelatin with 1 tbs water or orange juice until it dissolves and no lumps remain. Now put about 1/3 of the puree into a saucepan and warm it to almost boiling. Mix this with the gelatin mixture. It will almost immediately start to set. Add this to the remaining puree and the whipped cream, and stir gently but firmly until you have a uniform mixture. This has to be done pretty quickly -- the gel is quick-setting, remember? -- so have everything you need handy. Pour the filling to the lined pan and smooth the top with a spatula. Tap the bottom of the pan lightly on the table so that the filling settles and fills in the gaps between the lining slices. Trim the tops of the lining slices if necessary to make them even with the filling. Cover and refrigerate for several hours or overnight. After you unmold the dessert, quickly prepare the orange glaze and brush the top and sides of the charlotte with the glaze until evenly coated and glistening.
Sugar Syrup
I halved the ingredients when I made this. The sugar-water ratio is such that it can be kept at room temperature almost indefinitely. You will need only 2 tsp or so for this dessert, but you can use the leftover for other sponge type cakes. You can flavor it with fruit juices, too.
2 c sugar 1 c water
Combine the sugar and water in the saucepan and bring to a boil, stirring occasionally to dissolve all the sugar. Cover and allow the syrup to cool. Cover airtight for up to several months at room temperature. If crystals form, strain them before use.
Orange Glaze
1 tsp gelatin 3 tbs orange juice 3 tbs water 3 tbs sugar
Mix the gelatin with a little of the water until dissolved. Heat the orange juice and sugar until it comes to a boil and the sugar dissolves. Mix in the gelatin followed by the remaining water to cool it a little bit and trigger setting. When the glaze starts to thicken, apply it to the dessert with a pastry brush.