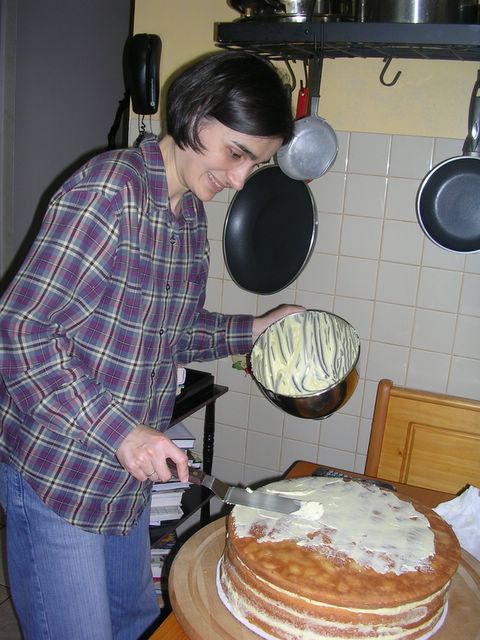
This morning, Fatima, Halit and I crumb-coated the cakes with Neoclassic buttercream. A crumb coat locks in the crumbs as the name implies, and it also provides a smoother surface for the final coat of buttercream. The above picture shows Fatima crumb-coating the 14" cake.
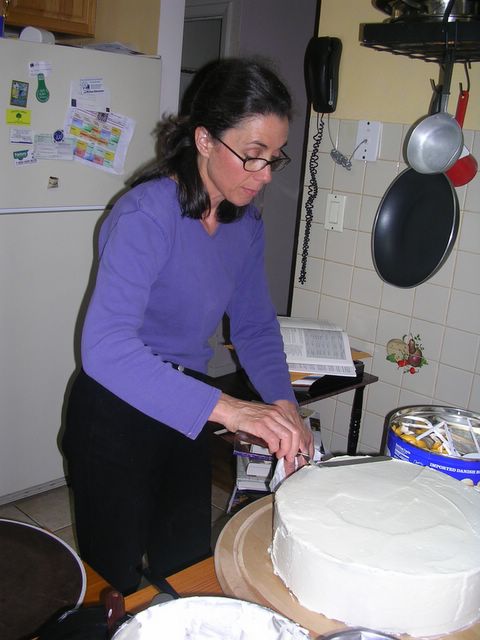
Our friend Aisha, who is experienced with wedding cakes, was at her friend's daughter's wedding today. She helped her friend decorate and serve their wedding cake. Right after that wedding, she rushed to our house to frost Amina's cakes. She has a way with the spatula! (Aisha's success mostly comes from experience, but one thing I saw her do was to dip her spatula in hot water and wipe it dry before she smoothed the buttercream; using a turntable also helped.) I attempted to frost the 6" and 8" cakes before she came, but they did not look nearly as good, and she had to correct them, too. You can see her working her magic with the 14" cake in the above picture.
The plan is to transport the cakes to the dergah at 10 am tomorrow. There, we will finish the piped decorations, assemble the cake and decorate it with flowers. Aisha will be doing most of these, and I will try to assist her, but I suspect that I will mostly be running around nervously.
We had thunderstorms this afternoon. There is a chance of showers tomorrow, too. I just wish that the weather cooperates so that we can have tables outside in the dergah's garden which is very beautiful at this time of the year.
Here is the inside of my basement refrigerator chock-full of cake. (12" and 6" cakes are on the top rack, 8" and 10" cakes on the middle one and 14" cake on the bottom.)It took me half a day to cut, fill and assemble the cakes you see in the picture. The ziplock bags on the lower shelf contain the buttercream that will go on the outside of the cake tomorrow. I have 22 cups of frosting, if that is not enough, I have the ingredients to whip up another half batch ready. The cakes turned out quite high and heavy even for a wedding cake. Now I worry about whether the lower tiers will hold the weight of the upper ones once they are stacked.
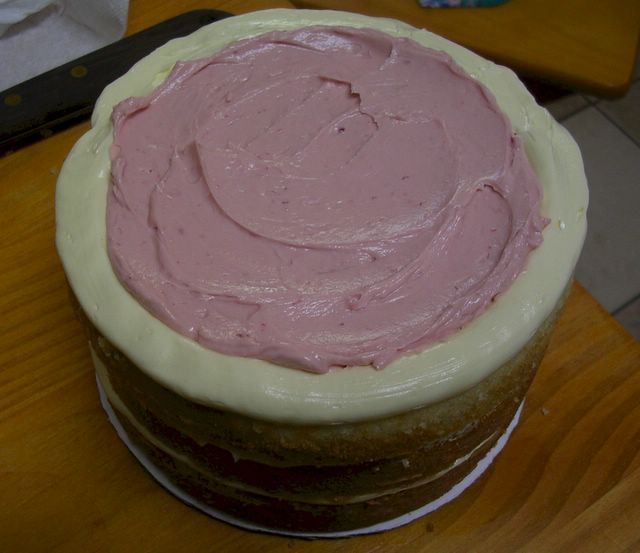
The picture below shows the 6" cake being frosted. My kitchen does not have great lighting, hence the quality of the picture. The light colored buttercream border is there to ensure that the raspberry buttercream does not bleed onto the outer frosting. Since the raspberry buttercream turned out quite good, I decided to go raspberry for all in-between layers.
It is almost midnight now. Fatima and Halit will soon board their plane. :)
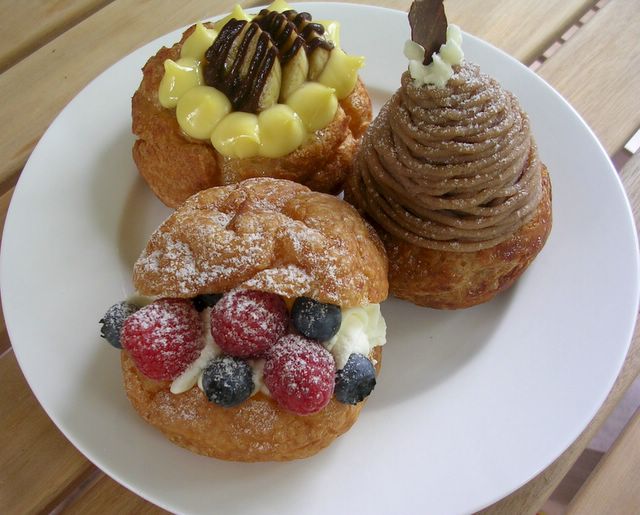
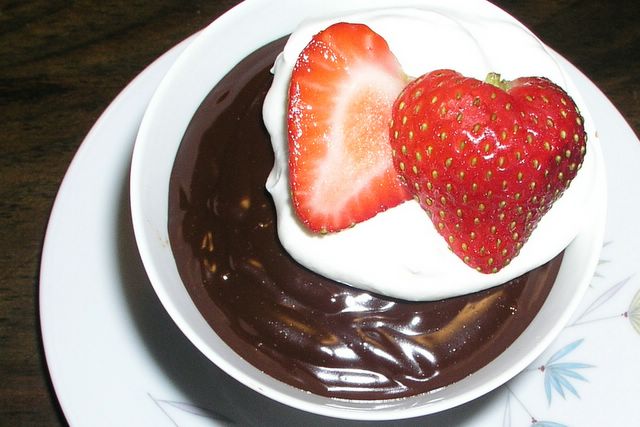
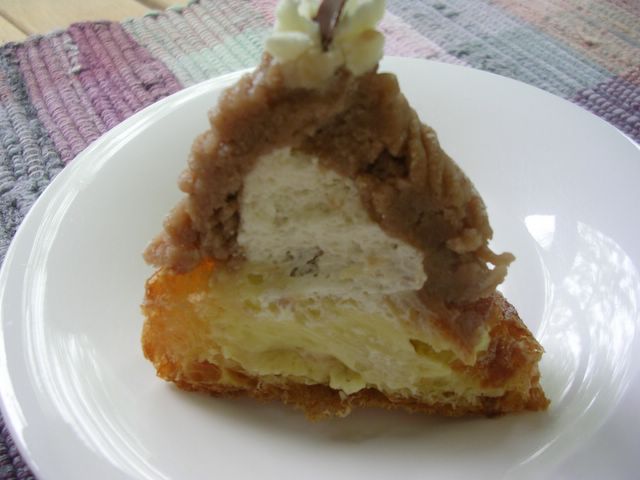
Today, my friend Mirsada stopped by to bring me this sampling of desserts from Choux Factory, a Japanese-operated bakery in Upper East Side of Manhattan specializing in giant sized piped-to-order cream puffs. After seeing Hatice's beautiful profiteroles in SeMaVeR, I had already set myself the goal of learning to make choux paste, and now I am more motivated than ever to do so. Of the three featured above, my favorite one was the cone shaped open-faced cream puff. The bottom layer of filling was rich pastry cream with a mound of whipped cream on top. Lightly toasted pecans stood lengthwise around the cream providing height, body and a lovely crunch to the dessert and sweetened chestnut puree was piped all around this to form the cone. A rosette of whipped cream topped with a tiny chocolate leaf completed the presentation. (If I lost you with this lengthy description, click here to see the cross-section of the dessert.) The other open-faced cream puff was filled with chocolate pastry cream studded with banana chunks, topped with tiny mounds of french buttercream, and chocolate drizzled banana slices. And the third one was a regular cream puff dusted lightly with powdered sugar and filled with buttercream, whipped cream, raspberries and bluberries. What a feast! All three were delicious and deceivingly light. Thank you, Mirsada, for the unexpected visit and the beautiful pastries.
Choux Factory 865 1st Ave, New York 10017 At 48th St Phone: 212-223-0730 Fax: 212-223-0731
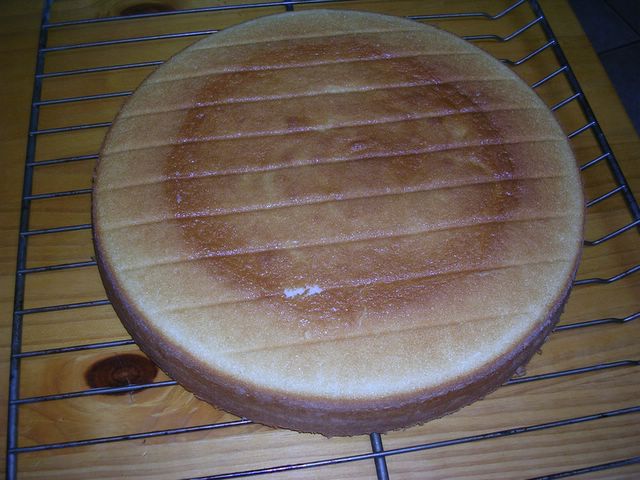
This is the last 14" cake just before I packed it to be put in the freezer. As you can see, in the absence of a big enough baking rack, I used one of my oven shelves to cool it on. Since the cake has a soft crumb, the rack left indentation marks on the top. But this is perfectly fine since the top will be trimmed anyway. With this, I am officially done with baking and ready for the next phase.
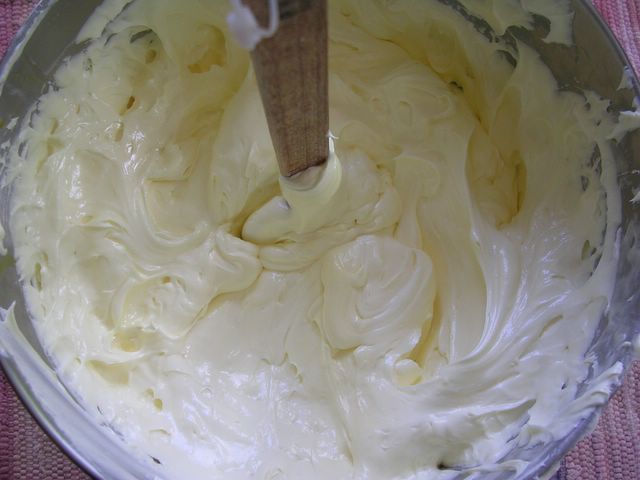
On Saturday, I made my third (and hopefully last) batch of Neoclassic buttercream. This time, I was smart and used an instant thermometer to check if the syrup reached softball stage. The outcome was the best buttercream I have made yet; firm in consistency, creamy in color and not at all buttery in taste. At the very end of this journey, I feel like I have finally learned how to make buttercream. Now I keep asking myself if I should make another batch to replace the one that seemed a little runny? I guess I will decide after I see how it looks after defrosting. Maybe the overall consistency will be acceptable when I mix all three batches together.
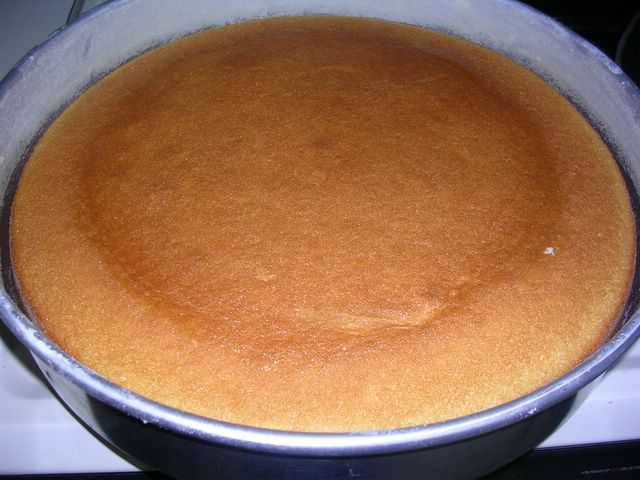
Today's plan was to bake the first half of the 14" cake. I had leftover egg whites from the buttercream to use for the cake. (In retrospect, I am glad for my switch to a white butter cake. Egg yolks for the buttercream and whites for the cake balance out. Otherwise, the number of yolks used for the finished cake would be close to 150, and what was I to do with all those egg whites? You can eat only so many meringue cookies, right?) Anyway, I took a midday nap today which is quite unusual for me. When I got up, I immediately started to make the cake. I guess I was not really awake, because I made 2 careless mistakes. First, I mixed all the milk with egg whites (only 1/4th of it was to be mixed with egg whites). I tried to remedy this as best as I could and continued preparing the batter. Half an hour into baking, I observed that the cake was trying to peak, and to my horror, I realized that I had forgotten to use the magistrips that help the cake to rise uniformly. Well, at that point, there was nothing I could do about that. Fortunately, the cake leveled out after I took it out of the oven. I think the size also helped a little bit, things could have been worse had I been baking a smaller cake. As I write this, I am waiting for the cake to cool down completely, so that I can wrap it airtight and put it the freezer.
I am very grateful that things are proceeding the way they are in spite of my careless mistakes. For me, this is nothing short of a miracle.
When I first noticed this recipe in one of my favorite dessert books "PURE CHOCOLATE" by Fran Bigelow, it looked very attractive and easy. I never came across a pudding recipe before that is made without starch but with egg yolks. It is basically pastry cream with added chocolate while it is hot. The result was very good and also very rich. May be too rich. I would appreciate if my friends try it and let me know what they think. I would be nervous to replace cream with milk, but I thought if the chocolate amount is slightly decreased that should help. I am also curious to see if I add raspberry sauce to the same custard base, would I come up with an edible equally delicious raspberry pudding or a disaster. Since I crave for berries recently I am tempted to give it a try.
Ingredients: 11/2 cups heavy cream 1/2 cup sugar 1/2 vanilla bean, split lengthwise ( I used vanilla extract instead, but it has to be added after the pot removed from the heat ) 5 l arge egg yolks 7oz semisweet chocolate finely chopped Lightly sweetened whipped cream and berries for garnish ( but original recipe recommends Cappuccino whipped cream instead, which I will add at the very end )
In a small saucepan combine the cream and sugar. Using the back of a paring knife , scrape the vanilla bean seeds into the mixture. Toss the bean. Place over medium heat and bring just to a simmer. Remove from the heat. If you are using vanilla extract instead of the bean you should add it at this stage.
In a mixing bowl, whisk the egg yolks until frothy. Slowly pour one-third of the cream into the yolks, whisking constantly. Pour the mixture back into the pan and return to low heat. Cook, stirring constantly, until the mixture coats the back of a spoon ( about 160 degrees ).
Remove from the heat. Remove and discard the vanilla bean. Add the finely chopped chocolate and whisk until melted and smooth.
While mixture is still warm, pour into a serving bowl or into 8 individual demitasse cups. Let cool slightly, then top with loosely whipped cappuccino cream and serve. I garnished it with whipped cream and strawberries.
Princess Pudding is best served at room temperature, to bring out the chocolate flavor. It can be refrigerated as long as 2 days.
Cappuccino Whipped Cream:
1/4 cup plus 2 tbsps sugar 3 tbsps brewed espresso or 2 tbsps water mixed with 2 tbsps instant coffee (preferably freeze-dried ) 2 cups heavy cream, chilled
Either by hand or using a mixer, whisk together the sugar and coffee until frothy. The sugar will begin to dissolve. Add the cream and whisk until thoroughly combined and soft peaks form. Take care not to overwhip the cream as it may begin to lose its cremy texture. Store in the refrigerator.


